






Wednesday, April 27, 2011
Blogging on hold......
We are finally home after spending Easter in Charlotte and then a few days at the Beach. Tomorrow more family arrive and then hubby is shipped off for deployment. I will be back next week sometime! Miss Blogging and reading my fellow Bloggers Blogs but things are super crazy around here for me to even try to sit down for a minute or two!! Hope everyone had a fabulous Easter and see you all next week :)


Thursday, April 21, 2011
HH6 - April Challenge
April's Challenge -
Create a meal or a dish from a country you have been stationed in, lived in, visited, or would like to visit (America excluded). It can be a main dish, side dish, dessert, drink, or all of the above. Tell us the story of why you chose it and if it has any special meaning to you or your family.
Some of my all time favorite childhood memories are the trips we made as a family to the Black Forest while stationed at Ramstein, Germany. We always stayed at our favorite Gastehaus where rolls, cheese, butter, and slices of meat were served as breakfast items (which to this day I blame for my hips and love of all butter, cheese, and bread - HAHA). The scenery is truly breathe taking during all seasons but my favorite was always winter. Where I could look out the window and dream of walking through the Forest while the snow was falling at night.
As I get older the memories are fading but I hold onto the hope of going back one day to visit. Till then, occasionally I try my hand at German dishes and treats. Like the treat I am about to share with you.....Black Forest Cake.
I didn't have a a recipe of my own for Black Forest Cake. So I went to the Internet and researched many recipes. I quickly learned about "Traditional" Black Forest Cake and "Americanized" (so to speak) version. I decided to make more of a "Americanized" Black Forest Cake because the traditional made me nervous.
Black Forest Cake -
*my notes
Ingredients
1 2/3 cups all-purpose flour
2/3 cup unsweetened cocoa powder
1 1/2 teaspoons baking soda
1 teaspoon salt
1/2 cup shortening
1 1/2 cups white sugar
2 eggs
1 teaspoon vanilla extract
1 1/2 cups buttermilk
1/2 cup kirschwasser *searched all over town and no one sold this. I used the juice from the jar of cherries
1/2 cup butter
3 1/2 cups confectioners' sugar
1 pinch salt
1 teaspoon strong brewed coffee *I don't drink coffee, therefor none was made and used
2 (14 ounce) cans pitted Bing cherries, drained *Can't tell you what Bing cherries are. I used the jar cherries that were pitted and believe they were Wal-Mart brand. Cherry Pie filling could work but I wouldn't use.
2 cups heavy whipping cream
1/2 teaspoon vanilla extract
1 tablespoon kirschwasser *I used cherry juice from jar
1 (1 ounce) square semisweet
**Make sure to taste your whip cream for sweetness. I added sugar until it was to the sweetness of my liking.
Directions
1 - Preheat oven to 350 degrees F (175 degrees C). Line the bottoms of two 8 inch round pans *I used 2 round 9 inch pans since I couldn't find my 8 inch pans with parchment paper circles. Sift together flour, cocoa, baking soda and 1 teaspoon salt. Set aside.


Black Forest Cake -
*my notes
Ingredients
1 2/3 cups all-purpose flour
2/3 cup unsweetened cocoa powder
1 1/2 teaspoons baking soda
1 teaspoon salt
1/2 cup shortening
1 1/2 cups white sugar
2 eggs
1 teaspoon vanilla extract
1 1/2 cups buttermilk
1/2 cup kirschwasser *searched all over town and no one sold this. I used the juice from the jar of cherries
1/2 cup butter
3 1/2 cups confectioners' sugar
1 pinch salt
1 teaspoon strong brewed coffee *I don't drink coffee, therefor none was made and used
2 (14 ounce) cans pitted Bing cherries, drained *Can't tell you what Bing cherries are. I used the jar cherries that were pitted and believe they were Wal-Mart brand. Cherry Pie filling could work but I wouldn't use.
2 cups heavy whipping cream
1/2 teaspoon vanilla extract
1 tablespoon kirschwasser *I used cherry juice from jar
1 (1 ounce) square semisweet
**Make sure to taste your whip cream for sweetness. I added sugar until it was to the sweetness of my liking.
Directions
1 - Preheat oven to 350 degrees F (175 degrees C). Line the bottoms of two 8 inch round pans *I used 2 round 9 inch pans since I couldn't find my 8 inch pans with parchment paper circles. Sift together flour, cocoa, baking soda and 1 teaspoon salt. Set aside.

Dry ingredients shifted...I need to buy a nicer one
so the ingredients don't clog up
2 - Cream shortening and sugar until light and fluffy. Beat in eggs and vanilla. Beat in flour mixture, alternating with buttermilk, until combined. Pour into 2 round 8 inch pans.

My mixer starting the creaming process
3 - Bake at 350 degrees F for 35 to 40 minutes, or until a toothpick inserted into the cake comes out clean. Cool completely. Remove paper from the cakes. Cut each layer in half, horizontally, making 4 layers total *cut carefully and evenly or you will have uneven layers like mine....honestly if going 9 inch I would skip cutting cakes in half. Sprinkle layers with the 1/2 cup kirshwasser.

1st ever from complete scratch cake...very delish!
Cooked 35 and 30 probably would have been perfect.
4 - In a medium bowl, cream the butter until light and fluffy. Add confectioners sugar, pinch of salt, and coffee; beat until smooth. If the consistency is too thick, add a couple teaspoons of cherry juice or milk. Spread first layer of cake with 1/3 of the filling. Top with 1/3 of the cherries. Repeat with the remaining layers.

Bottom layers

This is where I was distracted singing with my iPad
and cut the other cake way horribly. Nothing a little
bit of frosting can't fix......
5 - In a separate bowl, whip the cream to stiff peaks. Beat in 1/2 teaspoon vanilla and 1 tablespoon kirshwasser. Frost top and sides of cake. Sprinkle with chocolate curls made by using a potato peeler on semisweet baking chocolate.

Finished cake
Now I wish I could tell you how fabulous or horrible this cake is. I didn't want to cut into the cake since it was going to work with Mr. May (Mr. May's unit are sometimes my taste testers). However, I can tell you Mr. May brought home a empty cake tray. As well as several requests for me to make the unit more cakes. So from my fabulous taste testers......HUGE Success!!
Enjoy and don't forget to check out the other HH6 Bloggers
(listed on the first HH6 Posting)
Tuesday, April 19, 2011
Patio Furniture Redo
Tip Me Tuesday I try to share craft projects I have created or ones I find in Blogger World that I love. Today I am sharing my latest project.....Iron Patio Furniture Redo. We are renting our house and the owners left this 3 piece White Iron Table and Chairs set. It was in bad shape. As in rusting, missing a few nuts and bolts, and part of of the table is broken.
All over Blogger World I see people using Spray Paint to recover or redo furniture, picture frames, etc. Thats when I decided I wanted to try my hand at Spray Paint. Called the landlord and she said I can do whatever I want with the table since a friend was supposed to collect before the move.
Their lose is my gain. I now have the patio set on our back patio. Slowly turning a small section of the patio into my flower pot garden area. I will admit that I jumped feet first into this project. I went to Home Depot, bought Spray Paint that I liked, came home, and spray painted the furniture. I did zero prep work and the pieces came out great!


All over Blogger World I see people using Spray Paint to recover or redo furniture, picture frames, etc. Thats when I decided I wanted to try my hand at Spray Paint. Called the landlord and she said I can do whatever I want with the table since a friend was supposed to collect before the move.
Their lose is my gain. I now have the patio set on our back patio. Slowly turning a small section of the patio into my flower pot garden area. I will admit that I jumped feet first into this project. I went to Home Depot, bought Spray Paint that I liked, came home, and spray painted the furniture. I did zero prep work and the pieces came out great!
Here are the pictures.....Enjoy!!

Before with the spray paint I used

Before and After of the Chairs

Left table white because I couldn't make
up my mind if I wanted to go all Black
or a fun color.

The final product
I decided to go with Purple for the table. The red, blue, and white pots have my herbs (basil, lavendar, and mint). Green Pot I am still brainstorming on what I want to plant inside of it. Pot on top of the table did have my pink blooms but the storm that blew through this past weekend blew off all the blooms. I am also thinking about painting the pot on the table a different color as well!! The red pot used to be a brown color.

The paint I used
Do you have a Tip Me Tuesday project you would like to share? If so, make sure to leave a comment and link below. Would love to see what you have created. Happy Crafting!!!
*Linking up with Tip Junkie this week*
Monday, April 18, 2011
Wedding Dress - Mindful Monday
December 6, 2003 is truly one of my all time Top 10 Days of my life. A day where my last name changed and my heart was wrapped in such intense joy, love, and happiness ever since (add in few tears, heartbreak because that is what real love is....loving, getting hurt, but always fighting your way back to love).

I searched for a few weeks for the "perfect" dress. The dress where we will only wear once. Some may dream that one day your own daughter would wear the same dress on her wedding day.....I wore my dress for a few hours, quickly changed out of it, hit the road for a weekend trip to Hot Springs, AR (both Nathan and I were in college so we were very limited on budget for honeymoon, he had finals the next week, and I had to walk across the stage for my diploma).
Rocket forward (truly can't believe we will celebrate 11 years this Sept. since we have been together) to today. 8ish months short of celebrating our 8th Wedding Anniversary. I have not worn the wedding dress since, it has been shuffled between 4 moves, and until this weekend, it sat in back of the spare bedroom closet.
Till today.....A friend told me about a Blog where you can send in your wedding dress for donation. The donation of your wedding dress, will then be turned into small gowns for babies and children who have died. Your wedding dress that helped you look even more beautiful on your wedding day, will be able to help babies and children be buried in something beautiful.


Rocket forward (truly can't believe we will celebrate 11 years this Sept. since we have been together) to today. 8ish months short of celebrating our 8th Wedding Anniversary. I have not worn the wedding dress since, it has been shuffled between 4 moves, and until this weekend, it sat in back of the spare bedroom closet.
Till today.....A friend told me about a Blog where you can send in your wedding dress for donation. The donation of your wedding dress, will then be turned into small gowns for babies and children who have died. Your wedding dress that helped you look even more beautiful on your wedding day, will be able to help babies and children be buried in something beautiful.
I knew in my heart that this was something meant for my dress. Especially after losing our baby at 10.5 weeks (miscarriage) I couldn't help but think of what sorrow you would feel when picking out an outfit to bury your child in.

So I have boxed up my dress and will ship it off this afternoon. My dress is in honor of our own loss and friends who have lost their own precious babies. I would gladly pull out every wedding dress I could to just be able to bring some form of relief and joy in a time of such sadness and grief.
Sunday, April 17, 2011
Shrimp Tacos w/Spicy Cream Sauce - Recipe
I really really REALLY enjoy Seafood. Past three years in Ohio I have not had good Seafood. Blame it on being way up North, no bodies of water to get fresh fish, shrimp, etc, and if it was flown in "fresh" it would cost you an arm and a leg. Now that we are back in the South, especially in the Carolina's, I can now get fresh seafood. Here is a fabulous Shrimp Recipe!
Shrimp Tacos with Spicy Cream Sauce - Southern Living All Time Favorites Cookbook
**My notes
-1 (16oz) container of fat-free sour cream **we had so much sauce left over. So either cut the sauce in half or invite a large crowd over for Shrimp Tacos....my vote is large crowd! Also I used light instead of fat free
-2 t. chili powder, divided
-1 t. ground cumin, divided
-3/4 t. ground red pepper, divided
-3/4 t. salt, divided
-1/4 t. ground cinnamon
-3/4 c. water **I only used about 1/4 c. of water because fat free is liquidy enough for me
-1 lb. unpeeled, medium-size raw shrimp **I made sure to devein the shrimp as well as added a few more shrimp because the three of us were hungry
-3 T. orange juice **used V8 Splash flavor because all we had
-2 garlic cloves, minced
-2 t. olive oil
-1 avocado, chopped **I made a quick avocado dip since they were on the brown side
-8 (6 in.) corn, tortillas, warmed **Next time we will lightly fry to have some crunch
-Whisk together sour cream, 1 t. chili powder, 1/2 t. cumin, 1/2 t. red pepper, 1/4 t. salt, and cinnamon. Add 3/4 c. water, stirring until smooth. Cover and chill until ready to serve.


Shrimp Tacos with Spicy Cream Sauce - Southern Living All Time Favorites Cookbook
**My notes
-1 (16oz) container of fat-free sour cream **we had so much sauce left over. So either cut the sauce in half or invite a large crowd over for Shrimp Tacos....my vote is large crowd! Also I used light instead of fat free
-2 t. chili powder, divided
-1 t. ground cumin, divided
-3/4 t. ground red pepper, divided
-3/4 t. salt, divided
-1/4 t. ground cinnamon
-3/4 c. water **I only used about 1/4 c. of water because fat free is liquidy enough for me
-1 lb. unpeeled, medium-size raw shrimp **I made sure to devein the shrimp as well as added a few more shrimp because the three of us were hungry
-3 T. orange juice **used V8 Splash flavor because all we had
-2 garlic cloves, minced
-2 t. olive oil
-1 avocado, chopped **I made a quick avocado dip since they were on the brown side
-8 (6 in.) corn, tortillas, warmed **Next time we will lightly fry to have some crunch
-Whisk together sour cream, 1 t. chili powder, 1/2 t. cumin, 1/2 t. red pepper, 1/4 t. salt, and cinnamon. Add 3/4 c. water, stirring until smooth. Cover and chill until ready to serve.


-Peel shrimp, and devein, if desired. Combine remaining seasoning ingredients in Ziploc bag, add orange juice and shrimp. Turn to coat and chill for 15 minutes. Remove shrimp from bag and discard marinade

-Saute' garlic in hot oil in large skillet, over med-high heat for 2-3 minutes. Add shrimp and cook 5 minutes OR just until Shrimp turn pink. Do NOT over cook the shrimp.


-Serve with sour cream mixture, avocado, **shredded cheese, in warm tortillas.

-Enjoy!!!!!
Chicken Cordon Bleu - Recipe
I love CCB (Chicken Cordon Bleu). Just was to afraid to tackle making it homemade. Until my newest cookbook had simple ingredients and the best step by step directions. This recipe is a keeper and oh so yummy!!
CCB - Our Best Bites Cookbook
**are my notes
-3 boneless, skinless chicken breasts
-1/2 t. garlic powder
-1/2 t. onion powder
-1/4 t. black pepper
-1 c. shredded mozzarella, provolone, or Swiss cheese **I used mozz but next time will try with provolone
-6-12 slices thinly sliced ham **our ham was smoked ham
-1/2 c. all purpose flour
-2 eggs, lightly beaten
-1 c. panko bread crumbs
-1/2 c. freshly shredded Parmesan cheese **I used my Kraft green bottle that is grated since all on hand
-1 1/2 T. melted butter
-Preheat oven to 350 degrees. Spray baking sheet with nonstick spray
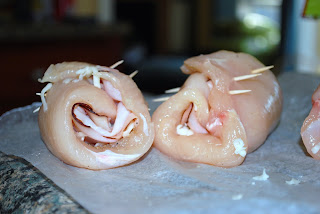
-Place breast on cutting board and place your non-dominant hand on top of chicken breast. Using sharp knife, cut each breast completely in half-horizontally. Place each piece between two pieces of plastic wrap and pound until breasts are about /4-1/2 in. thick. Repeat for remaining chicken (6 total pieces). **Make sure to pound out as much as possible or it is very difficult to roll and keep insides inside.




CCB - Our Best Bites Cookbook
**are my notes
-3 boneless, skinless chicken breasts
-1/2 t. garlic powder
-1/2 t. onion powder
-1/4 t. black pepper
-1 c. shredded mozzarella, provolone, or Swiss cheese **I used mozz but next time will try with provolone
-6-12 slices thinly sliced ham **our ham was smoked ham
-1/2 c. all purpose flour
-2 eggs, lightly beaten
-1 c. panko bread crumbs
-1/2 c. freshly shredded Parmesan cheese **I used my Kraft green bottle that is grated since all on hand
-1 1/2 T. melted butter
-Preheat oven to 350 degrees. Spray baking sheet with nonstick spray
-Place breast on cutting board and place your non-dominant hand on top of chicken breast. Using sharp knife, cut each breast completely in half-horizontally. Place each piece between two pieces of plastic wrap and pound until breasts are about /4-1/2 in. thick. Repeat for remaining chicken (6 total pieces). **Make sure to pound out as much as possible or it is very difficult to roll and keep insides inside.

-Combine seasonings and sprinkle over one side of chicken breasts. Divide cheese among all chicken breasts evenly, then lay 1-2 slices of ham, and roll chicken up to secure with toothpicks

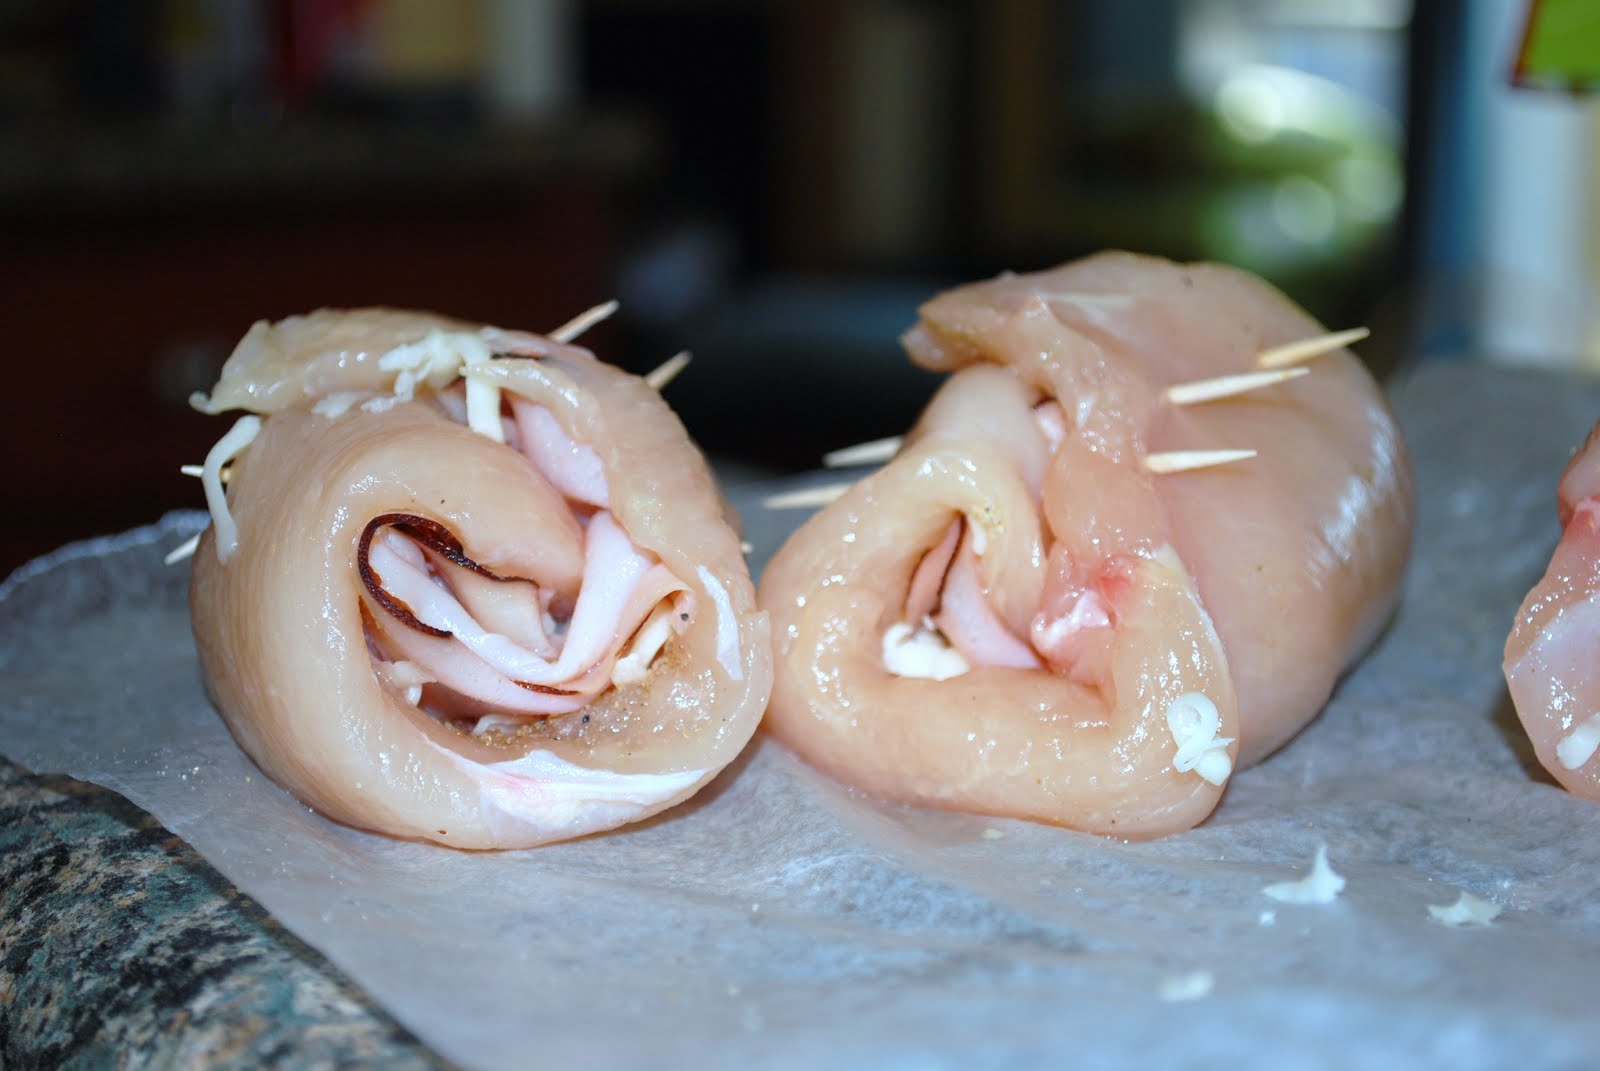
-Place flour, eggs, and bread crumbs/parm cheese all in separate shallow bowls
-Working with one chicken piece at a time, drudge into flour, then egg, and finally bread crumb mixture. Coat all sides and use fingers to press bread crumbs on **no pictures here because fingers were covered in yummy goodness
-Place chicken on baking sheet, drizzle with melted butter, and bake 25-35 minutes

-Cool 10 minutes before serving and remove toothpicks.

-Serving with some veggies and warm sourdough bread....Enjoy!!!!
Friday, April 15, 2011
Fever Series - Book Review

Good vs. Evil, Human World vs. Fae World, Love, Lust, War, and man I didn't want this series to end. Set to current day. Our world is coming to an end as we know. All because of the Unseelie unleashed into the human world. If you like mystery, a book that keeps you guessing on who done it, whose next, will love bring them together or continue to tear them apart, and come magic filled with Irish folklore.....then this series is for you. 4 out of 5 stars is my rating. It would get 5 out of 5 but language. It is not overly horrible with language but the "F" word is used through out but I know about readers and the "F" word.
It kept me guessing through all 5 books and even down to the last pages, asking exactly "Who is MacKayla Lane"? The Fever Series and one of the Highlander Series by Karen Marie Moning are the first I have read of Moning's. I plan on checking out more of the Highlander Series and see if I like them as much as the fever series.
Enjoy and if you have read the Fever Series, what did you think?
Subscribe to:
Posts (Atom)


